Style room
RECOnet fast neural style transfer
It's an AI style effect system that allows to render "styles" that are trained into a self-contained, performative model files, that takes visual style cues from "inspiration" image(s) to recreate the feel and style of these images at different levels of abstraction.
EWOCvj2 both offers a style room in which you can train your own models starting from a set of inspiration images, as well as a means of rendering these styles as effects in realtime in the mix room (see "Effects box").
Installation and entering the room
When you launch EWOCvj2 for the first time, the option is given to do multiple optional AI module installs. The first, RECOnet, will install the fast neural style transfer style training room. You can reach this optional AI install screen again afterwards by clicking "Optional AI install" on the opening screen (allowing to choose your project).
Realtime rendering of styles is offered with the standard install (no optional AI installs) . Some styles are supplied with the install. You can add .onnx style files from other sources by adding them to ProgramData/EWOCvj2/models/styles (on Windows).
When installed you can reach the style room by either selecting the style room from the top "ROOMS" menu (which is hidden until you hit the top screen edge) or by first moving from mix to bins room , and then moving from bins to style room by their respective wormgates (see "Wormgate to other rooms").
Inspiration images
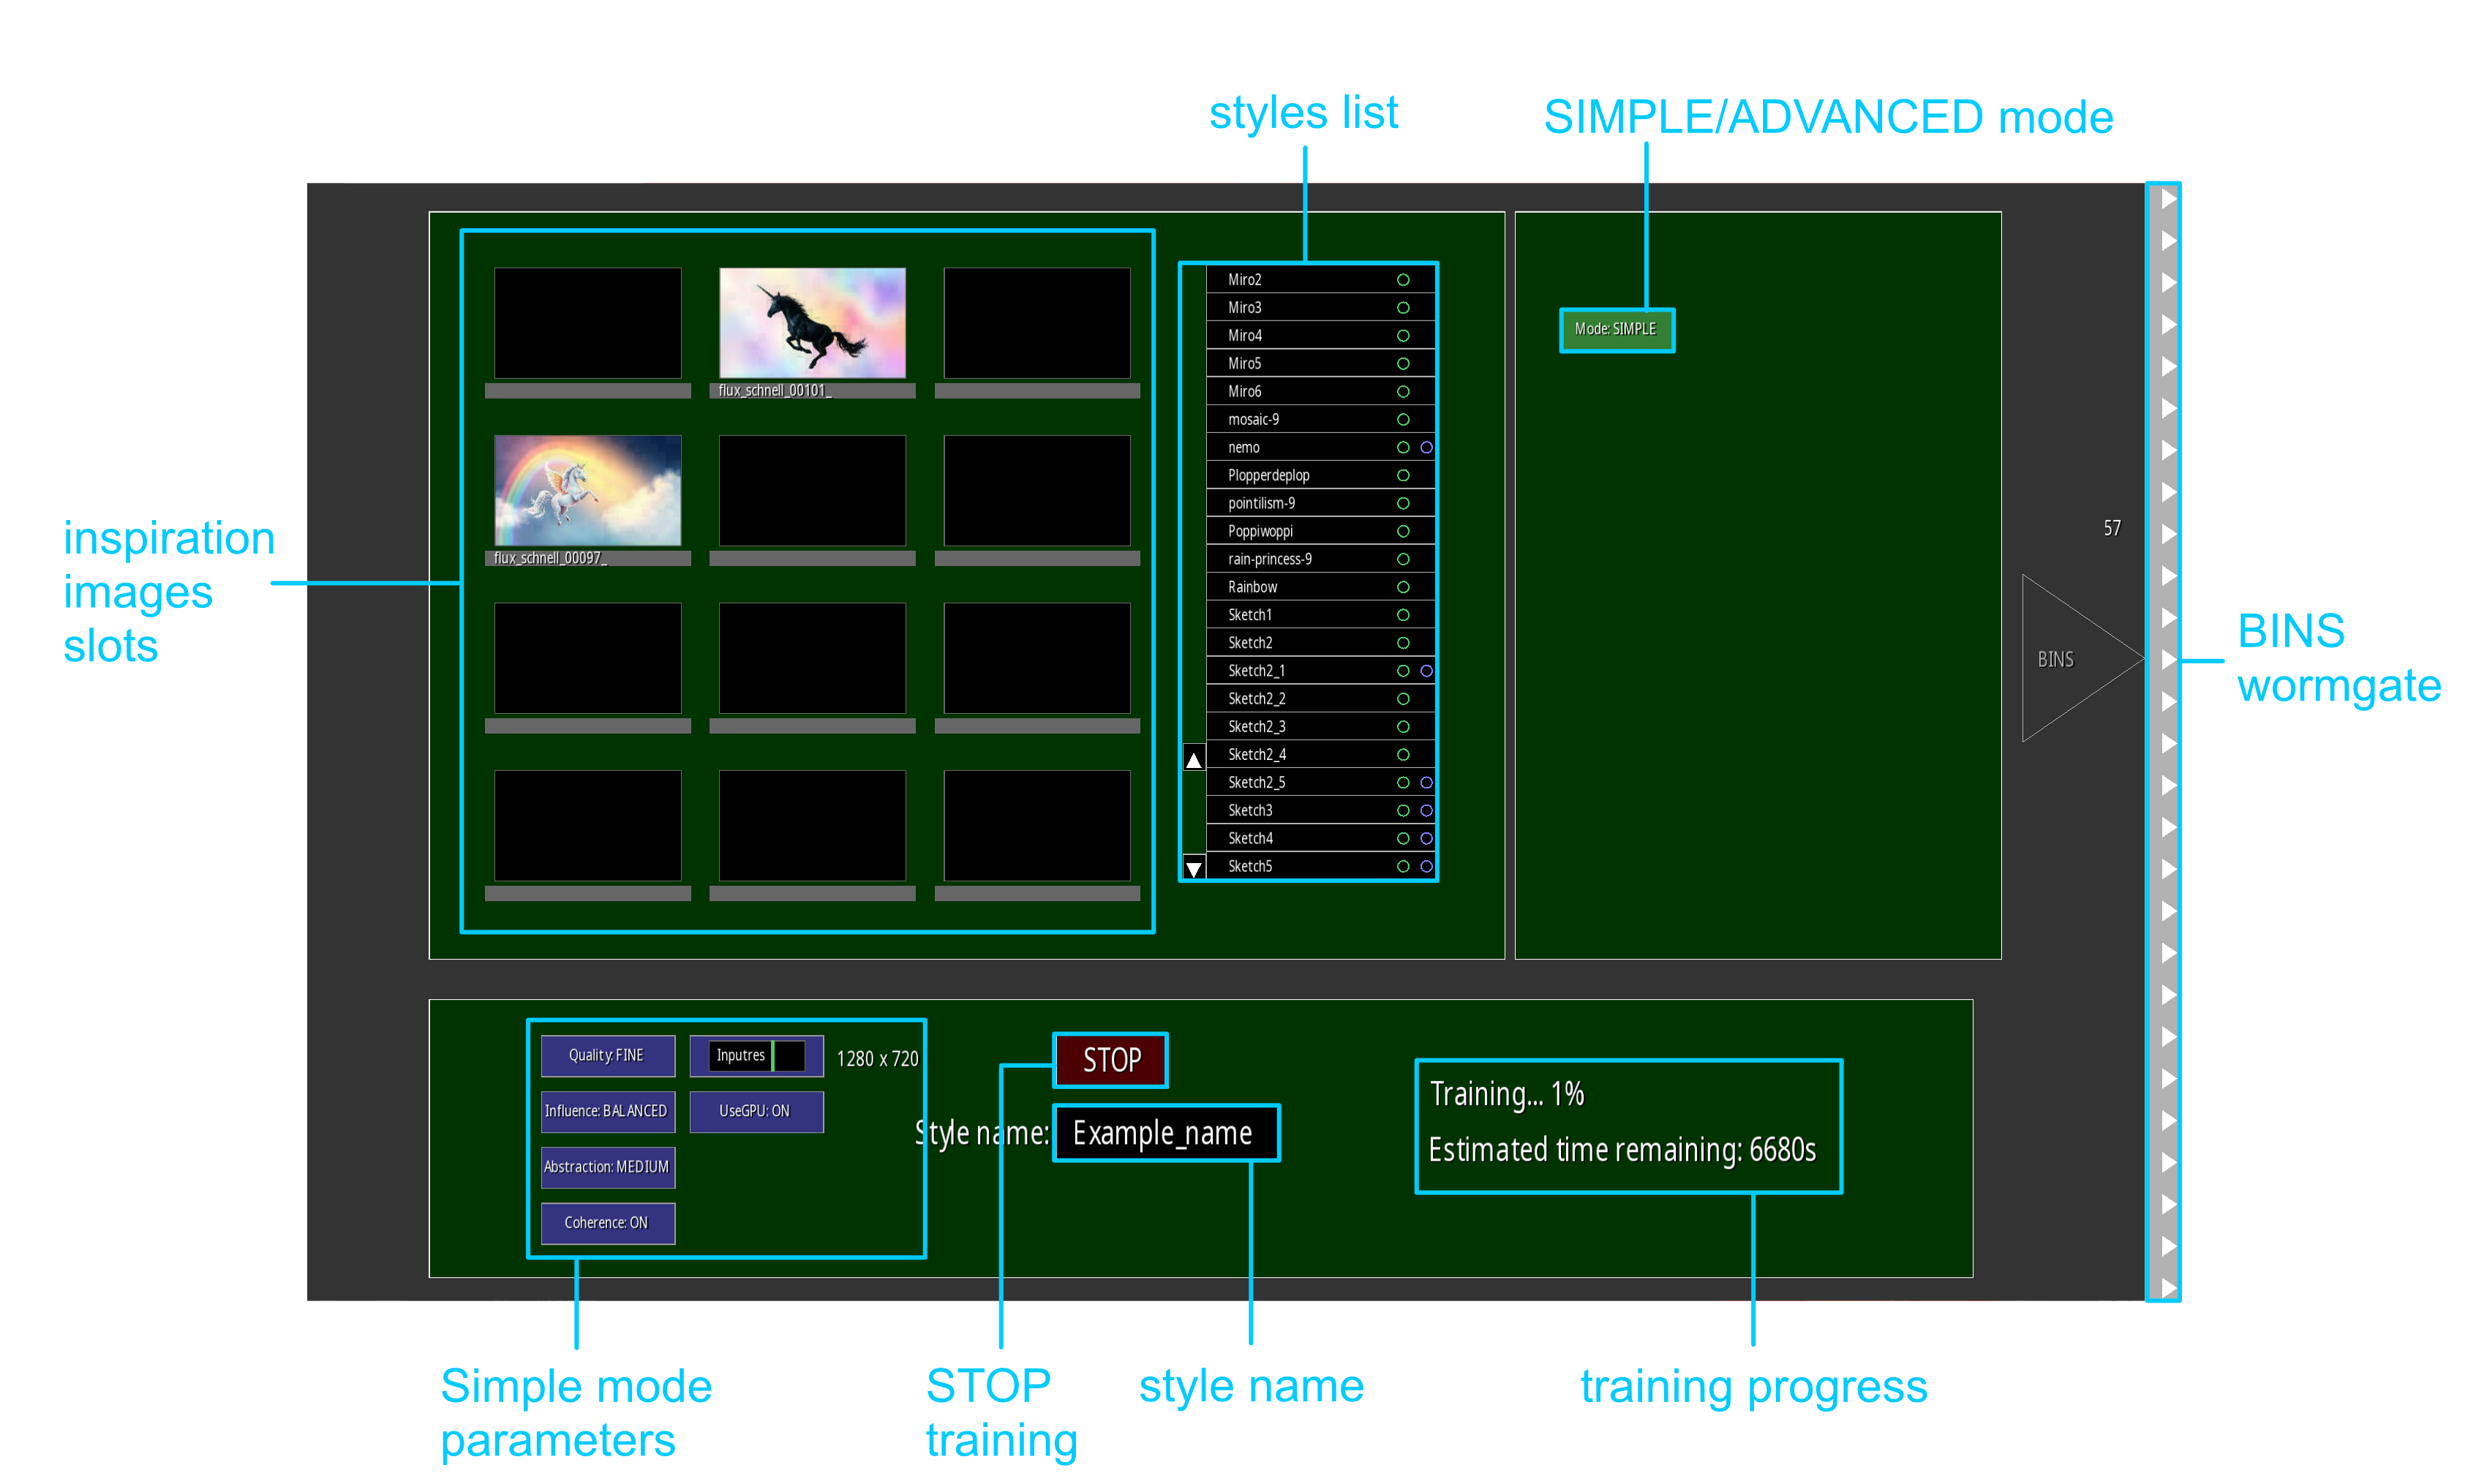
In the top left area of the styleroom screen there are 12 slots for putting inspiration images. Rightmouse menu on a box: you can either open (multiple) file(s), insert a snapshot of the deck A or B monitor, or insert a snapshot of the entire current mix. Do note that one good inspiration image is often enough to get a decent style. Adding more is always possible.
Styles list
To the right of the style inspiration image boxes, there is an alphabetical list of available styles. Next to the names there is a green and/or purple circle: a green circle means there is a trained .onnx file available for that style, while a purple circle denotes the style's creation settings (parameters, inspiration images) is saved in a subfolder in the styles folder on disk. There are three rightmouse menu options that allow handling those settings files:
-
"Clear style profile": start afresh with a new empty style
-
"Open style profile": open a .style file in its folder (from external sources)
-
"Save style profile": save the current style settings profile under its current name
You can scroll the list with the mousewheel orby clicking the up and down triangles next to it.
Training parameters
You can set the Inputres at the left bottom of the screen: it denotes the resolution to which the inspiration images will be scaled/prepared for training. Lower resolutions use less VRAM. Your image aspect ratio will be respected.
You can choose to train on CPU or GPU bysetting UseGPU to off or on.
Top right you can choose SIMPLE or ADVANCED mode.
-
SIMPLE mode: will show three extra option boxes at the bottom left:
-
"Quality" sets the resulting model's quality.
-
"Influence" sets the amount of style influence as opposed to content influence.
-
"Abstraction" sets the level of style abstraction to train.
-
"Coherence" turns temporal coherence on/off (if the style adapts fluently and consistently to changes in the style rendered video).
-
All parameters make the model be trained faster at lower settings. Quality also influences the amount of VRAM used.
-
ADVANCED mode: shows advanced settings at the top right:
-
"Layer": five layers of abstraction weights - level 5, highest abstraction.
-
"Content": weight of the initial video content
-
"Style": weight of the style itself
-
"Temporal": amount of temporal coherence
-
"Trainres": render resolution of the style, either 256x256 or 512x512, the first training the fastest.
-
"Iterations": number of training iterations - try 10000/20000/40000 for different qualities. Time spent training scales up with this number.
-
"Batch size":
-
Larger batch (up to 8): more stable gradients, faster training per iteration, but uses more VRAM.
-
Smaller batch (down to 1): less VRAM usage, noisier gradients, but can sometimes generalize better.
-
-
Training
Enter a name in the name box, do settings, then click "TRAIN" to start a training run. You will be informed of percentage of training done and probable remaining training time in seconds. During training you can hit the "STOP" button to kill the training process. Do note fast GPU's are required to get decent training times, which will still be at least half an hour, even at low settings and on a monster card. Performing in the mix room will still be possible during training, as the mix will always try to reach its target framerate. Training will use remaining resources.
Gate to media bins
On the right side of the screen the "BINS" wormgate is shown that can transport you to the media bins screen. Functionality explained in "Wormgates" on the "Bins room" page.